How to Clean a Patio Heater
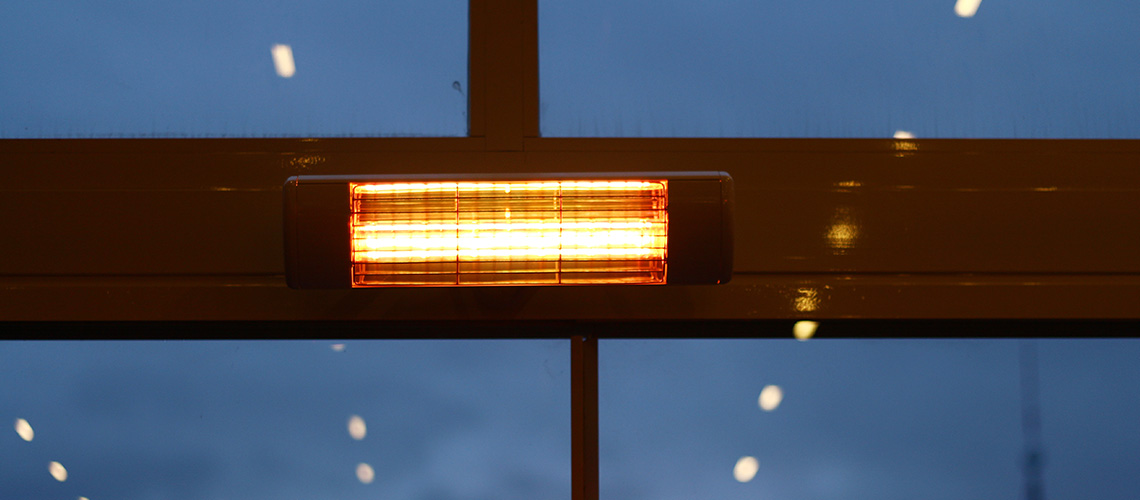
One Electric Patio Heater Mounted to the Wall of an Indoor Room

How many times have you got up early, sleepily waited for the coffee maker to do its thing and moseyed off to the patio to enjoy the morning opening its eyes while you struggle to open yours. Turning on the patio heater means in just moments you’ll start to feel warm and fuzzy as the first rays of sunshine turn the dew into thousands of refracted droplets. As the caffeine soaks in you realize that your patio heater is helping you to feel alive again, ready to take on the day. Life is good.

We use our patio heaters all the time – whether it’s sleepy mornings or partying long into the night – to keep our guests and family comfy while we bask in the warmth of our loved ones. So many of us couldn’t do without our patio heaters, and it’s become second nature for us to crank ‘em up as soon as our feet hit the patio.

Like so many things that surround us at home, you can only get the maximum amount of use from your patio heater by maintaining it properly – and one of the primary ways to lengthen the life of your patio heater is through proper cleaning. Since it’s such an important topic, I talked to our team – the best patio specialists in the business – to find out how to clean a patio heater.

Our experts recommend that every quarter you perform this cleaning ritual to keep your system in tip-top shape. Once summer is in full swing, follow these steps to clean your heater thoroughly to get the most efficient heat for your next outdoor shindig.

How do you clean an outdoor patio heater?

Firstly, and absolutely most importantly, review your instruction manual (or download it online) for instructions on the best way to clean your specific patio heater. Heaters are not alike, and your manual will key you into specifics you’ll need to do the job right.

Who’s on first? Safety!

No matter what type of patio heater you have, safety is your #1 priority. Make sure the heater has been off for a minimum of two hours before you attempt to clean any part of the heater (it should be absolutely cold). Turn off the fuel (natural gas valve, LP gas valve or electricity) before starting your cleaning. Disconnect the regulator from an LP gas cylinder system and remove the battery from the ignitor module.

Note that in all types of patio heaters, you should never get the burner, elements or pilot assembly wet as moisture can irreparably damage them and make the heater unsafe to use.

Never use a cleaning agent that is flammable or corrosive.

While cleaning, inspect the hoses to make sure you see no evidence of excessive abrasion or wear.

Cleaning Electric Patio Heaters

One 5000-Watt Electric Patio Heater Mounted to a Support Beam Under a Covered Patio

What You’ll Need

  • Soft Cloths (we recommend micro-fiber)
  • Mild, non-abrasive soap
  • Car wax or stainless-steel cleaner
  • For hard stains, citrus-based cleaners work best
  • Compressed Air (air compressor or canned air)

Process

  1. Using a soft damp cloth, clean the exterior housing
    • If you’re near the ocean, cleaning the housing every fortnight (for those like me who went to public schools, that’s two weeks) is recommended
    • After cleaning, rinse with clean water and let air dry
  2. Once dry, use stainless steel cleaner on stainless surfaces and car wax on painted surfaces to maintain that shine as long as possible
  3. Using a soft DRY cloth, clean the reflectors and elements
  4. Using compressed air, blow out the elements to remove dust and debris.

Cleaning Liquid Propane (LP) Gas Heaters

What You’ll Need

  • Soft Cloths (we recommend micro-fiber)
  • Mild, non-abrasive soap
  • Car wax or stainless-steel cleaner
  • For hard stains, citrus-based cleaners work best
  • Compressed Air (air compressor or canned air)

Process

  1. Use a soft, damp cloth to clean the exterior housing (micro-fiber is best)
    • If you’re in a salt-water area, cleaning the exterior every two weeks will retard the corrosive process
    • Once clean, rinse with clean warm water and allow to air dry
  2. Using either car wax (for painted surfaces) or stainless-steel cleaner (for, um, stainless-steel surfaces) put a nice shine on your heater
  3. Using compressed air blow out the heater head assembly – do not spray the heater head with water or use any cleaning solutions. You can remove the emitter grid to allow access to the pilot and main burner to give them a good blow out.

Cleaning Natural Gas Heaters

What You’ll Need

  • Soft Cloths (we recommend micro-fiber)
  • Mild, non-abrasive soap
  • Car wax or stainless-steel cleaner
  • For hard stains, citrus-based cleaners work best
  • Compressed Air (air compressor or canned air)
  • Emory cloth sandpaper
  • Pencil eraser

Process

  1. Clean the exterior housing with a soft, damp cloth
    • The exterior housing may need to be cleaned as often as every 2 weeks if you live near an ocean to slow the corrosion process.
    • Finally, rinse with warm clean water and allow to air dry.
  2. Once the surfaces are dry, use stainless-steel cleaner to shine the stainless-steel parts, and car wax to shine the painted parts
  3. Open the service door, check the blower motor and use compressed air (or a vacuum cleaner) to remove any debris
  4. Remove the burner head from the tube and use a combination of compressed air and/or a wire brush to remove any deposits or debris that may be on the actual burner
  5. Thermocouple: The thermocouple senses whether the flame is going, determining when to cycle the gas supply to the unit. Excess carbon buildup on the thermocouple can prevent your heater from lighting since the carbon absorbs heat, not allowing the proper voltage to enter the thermocouple. To clean the thermocouple:
    • Shut off the gas at the main gas control box
    • Locate the thermocouple and remove it.
    • Using emery cloth sandpaper, very lightly sand the thermocouple to remove the excess carbon.
    • For heavy dirt and soot buildup, use compressed air to clear the debris
    • Dirt and soot buildup can also be removed with fine steel wool or the scrubby side of a sponge
    • While you’re there, also clean the threads of the screw that tightens the thermocouple (use a pencil eraser to push out dirt)
    • Put the thermocouple back in place, and you’re back in business.

Whenever you have an appliance that moves heat (refrigerator, freezer, patio heater) you should pay special attention to the maintenance of that machine. Keeping dust and debris out of the system makes it work at its highest efficiency, saving you money and working better than if you just left it alone. In the case of a patio heater, keeping the elements clean will also decrease the possibility of fires and keep your family and guests as safe as they can be.

Again, we can’t stress enough the importance of reading, understanding, and following your patio heater manufacturer's instructions on maintenance – they’ll have specific notes to follow that are important for your specific heating system that we can’t cover in this broad discussion.

Thanks again to our patio experts for getting together and creating this guide for us… hey, did you know that these exact same patio experts are available to you any time you need them? Whenever you’re not sure which patio heater is right for your space or need to add weight to your cantilever umbrella, or just about anything else dealing with patio comfort, our experts are right there ready to lend a hand. Give us a call, we promise to treat you like family.